We also used the opportunity to explore flowers in art, which took us on a totally #artskicking trip from Kahlo to Van Gogh, Matisse and Monet. (Reading back that sentence makes me sound so up my own #arts, I am in fact a rather lazy mother, but when I bother my #arts to do stuff with them it just seems to spark discussions we wouldn't otherwise have.) I basically got the phone out (between taking all these pictures) and got them looking at images and talking about flowers in art. Simples.
To make your own blooms, you will need:

⚡️old plastic bags - the flimsier the better and scented nappy bags are brilliant too!
⚡️yellow napkins / tissue paper (or just use newspaper, or colour in some old paper))
⚡️clothespegs (£1 for fifty at Poundland)
⚡️scissors
⚡️darning needle and thread
⚡️crunchie (optional)
⚡️crunchie (optional)
⚡️plenty of imagination
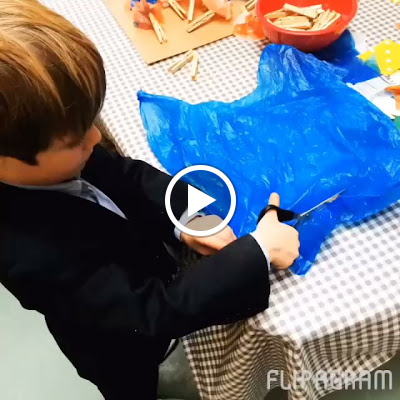
1. Cut the handles and bottoms (!) off the bags, flatten them out then cut into squares. You should get about 10 per bag.

To make circles (optional, this requires more scissors action, scrunched up square work just as well). - Take 2 squares and place on top of each other.
- Fold twice to make into a smaller square, then once more so you have a triangle shape.
- Snip the open end off the triangle, along a curved line.
- Open up and you'll have a circle. Ta Da!
You
can get really creative with your cutting - cut your triangle into a
heart shape, or cut into the triangle to create a "hairy" flower. Use pinking shears for an even frillier effect.
2. Cut the tissue paper / napkins into smaller squares for the flower centres (or as per above, cut them into circles)

3. Layer up your plastic and paper, with the yellow centre on top - we used 2 plastic and one paper, the more you use the fuller your blooms.


Make as many flowers as you want, the more mine made, the more
confident and creative they got. I had to give plenty of scissors help to both of them
(they’re 5 & 7) but they loved cutting up the bags and using the
pegs to hold it all together.
5. Line up your peggy blooms on a flat surface - this may take a while and requires patience and balancing skills!
6. On the count of three, everyone shouts “Bloooow Me Down!”... You get the idea. SO much craic, we did it over and over again. It’s coming
to all good kids stores soon...
A couple of days later, we took the flowers and made a gorgeous (weatherproof) garland for our wendy house. You just remove from the pegs and thread through some string with a nice big darning needle. Simples.


Also got to teach the Girlchild about the importance of "zhoozhing". Priceless learning right there.
They were definitely inspired and up for it in a whole new way last week, so much so that Spring showed up on Friday. Yay! As a result, there's a bit of a floral theme going on this week on on Facebook, Instagram and Twitter, hope you find something to inspire you. Feel free to share ;)
Swoosh!
The Arts Crusader ⚡️
P.S. Join the crusade on Facebook, Instagram, Twitter and Pinterest and give yourself a #KickUpTheArts
The Arts Crusader ⚡️
P.S. Join the crusade on Facebook, Instagram, Twitter and Pinterest and give yourself a #KickUpTheArts
No comments:
Post a Comment